How To Make a Font With Your Handwriting

Tweet

Welcome to my tutorial on how to turn your handwriting into a digital font! In this tutorial, I walk you through creating your own font, step-by step using a website called Calligraphr. This tutorial has only 9 steps and is easier than it sounds!

All Steps

Step 1: Go To Calligraphr And Sign Up

Before we start this tutorial, go to Calligraphr's online webapp.

Then, if you already have a Calligraphr account, sign-in to it. But you most likely do not, so click "register for free" to sign-up for one. After you sign up for one, you will have to enter a verification code that was emailed to the account you used to sign up with.

login screen of calligraphr email and password sign in to the left, register for freee button to the left

Step 2: Choose A Template

calligraphr web app home page, templates button in the top left in the navigation bar
Select "templates" in the navigation bar.
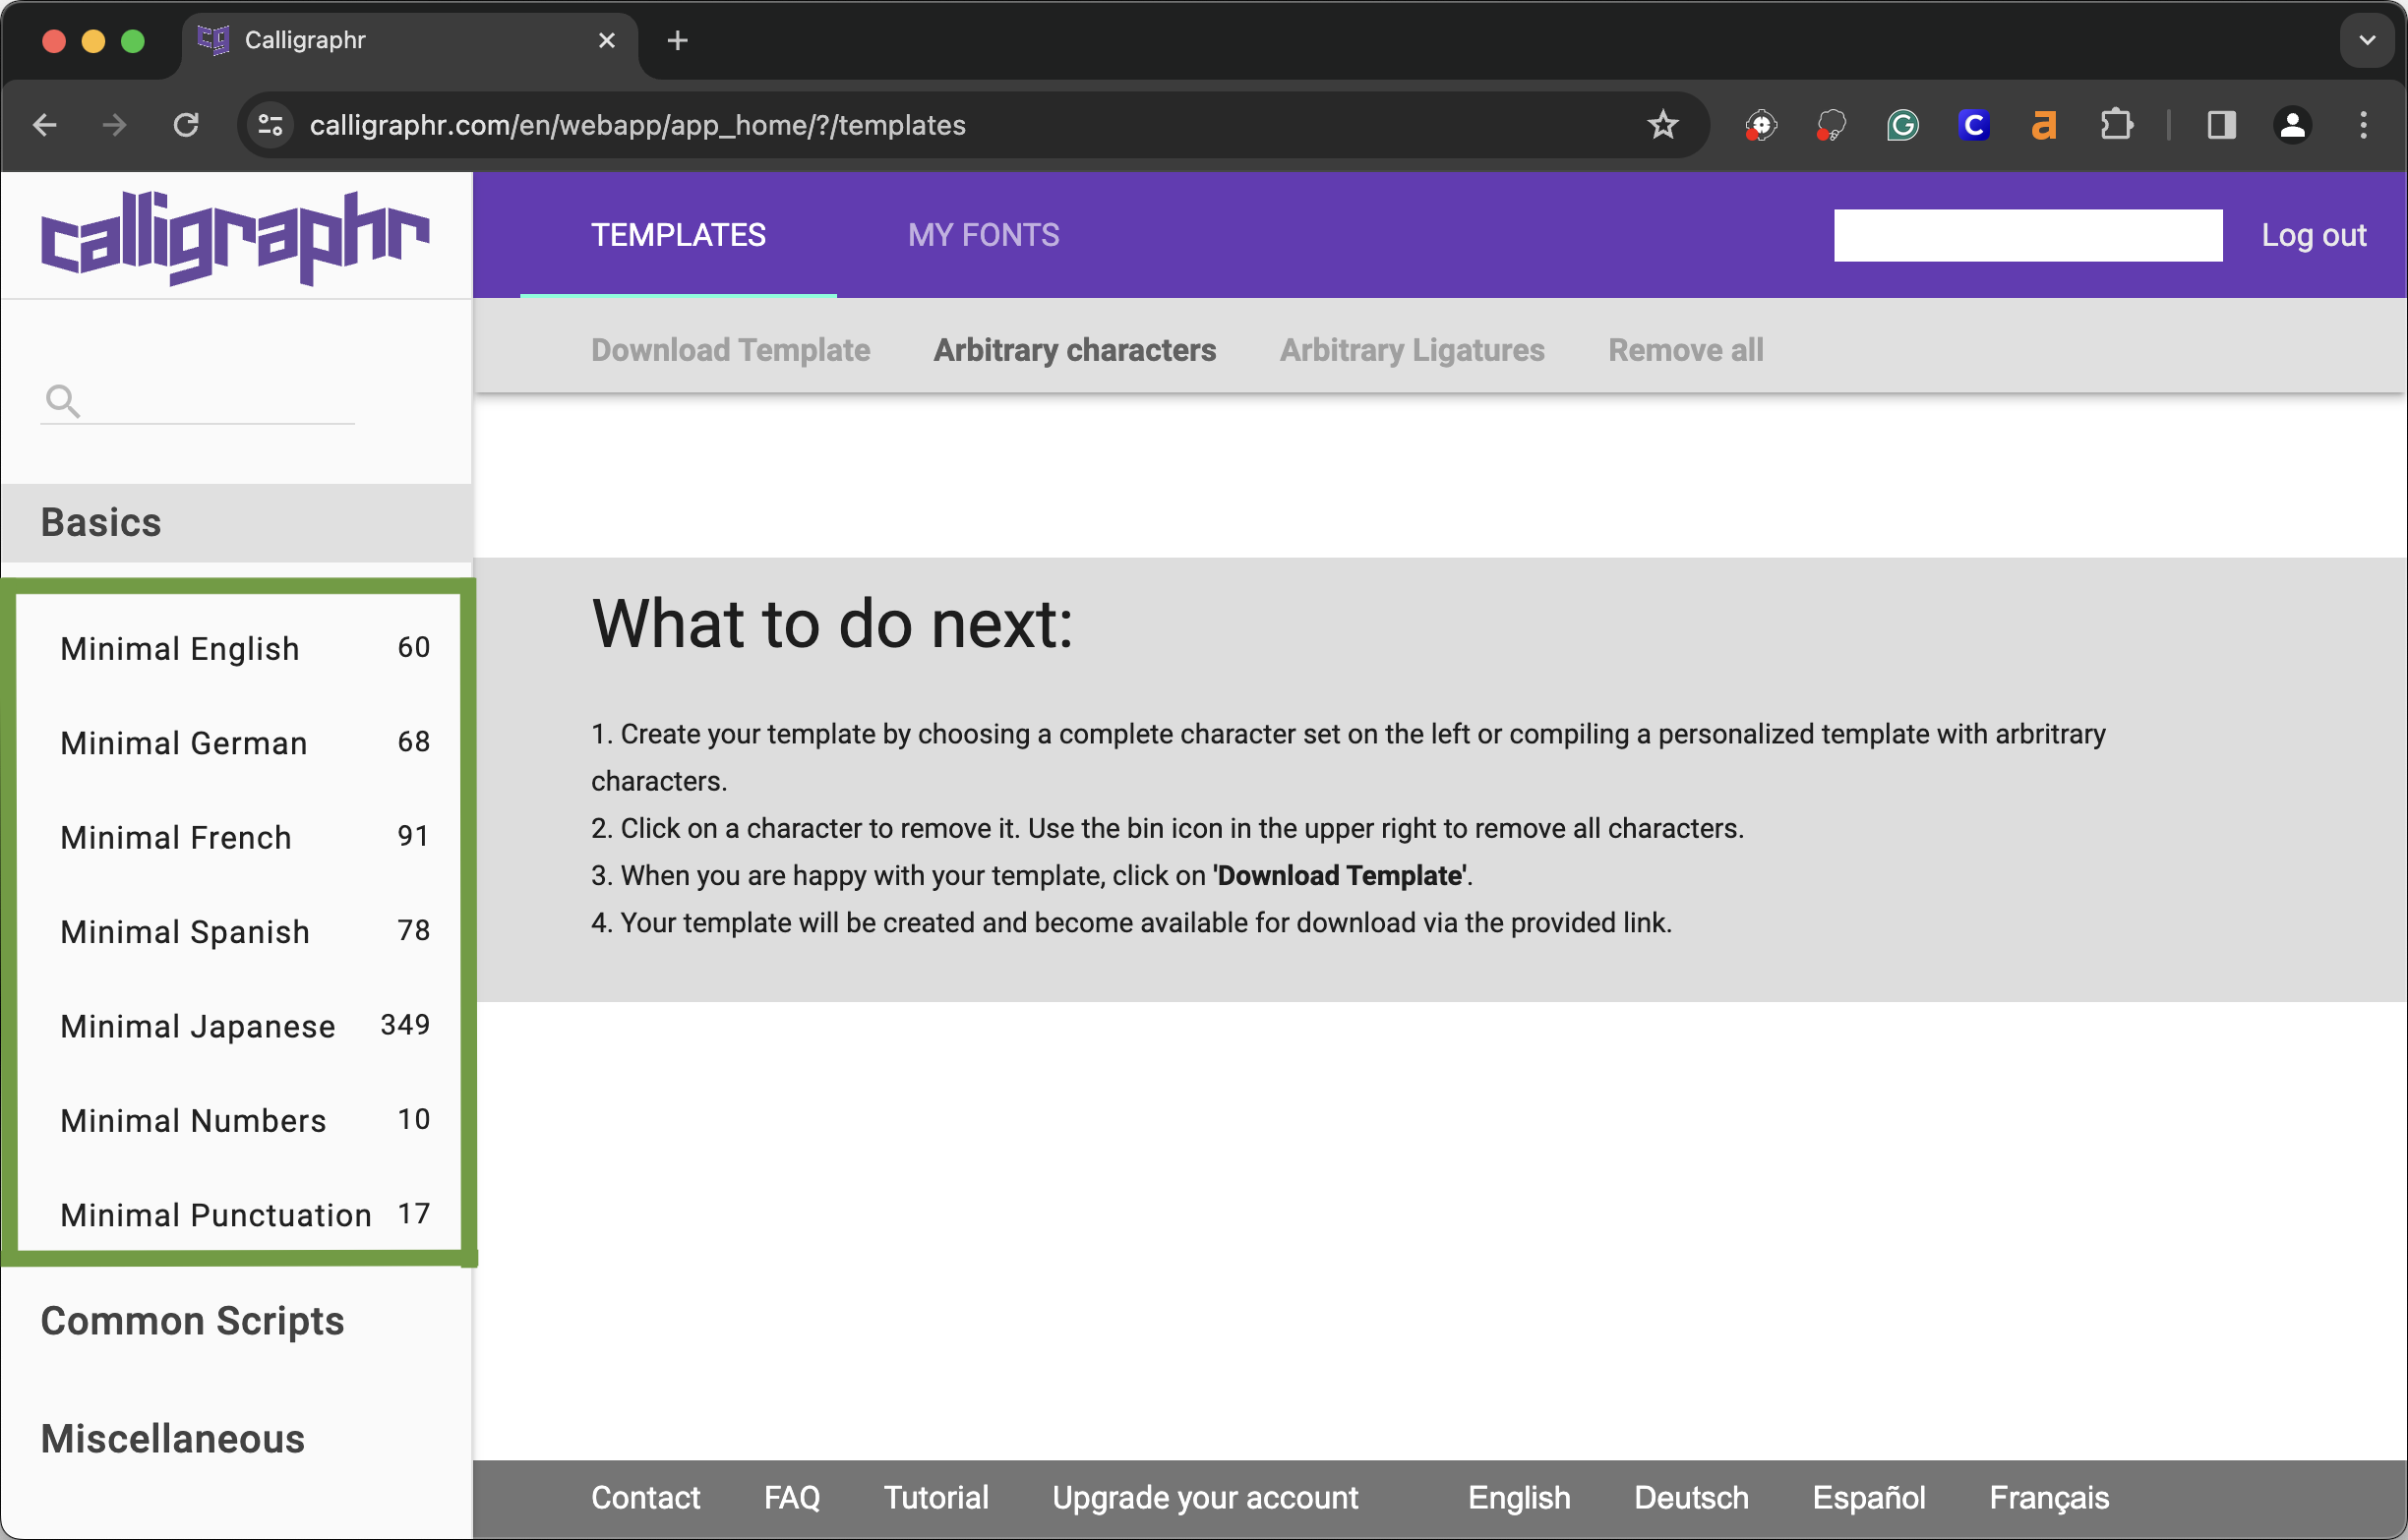
templates page of the calligraphr web app, the templates are in a sidebar to the left of the page
Choose a language you wish to make your font with. If you are choosing english, I recommend using "minimal english"

Step 3: Download & Print Template

the download template button is near the top left in the navigation bar
Select "download template"
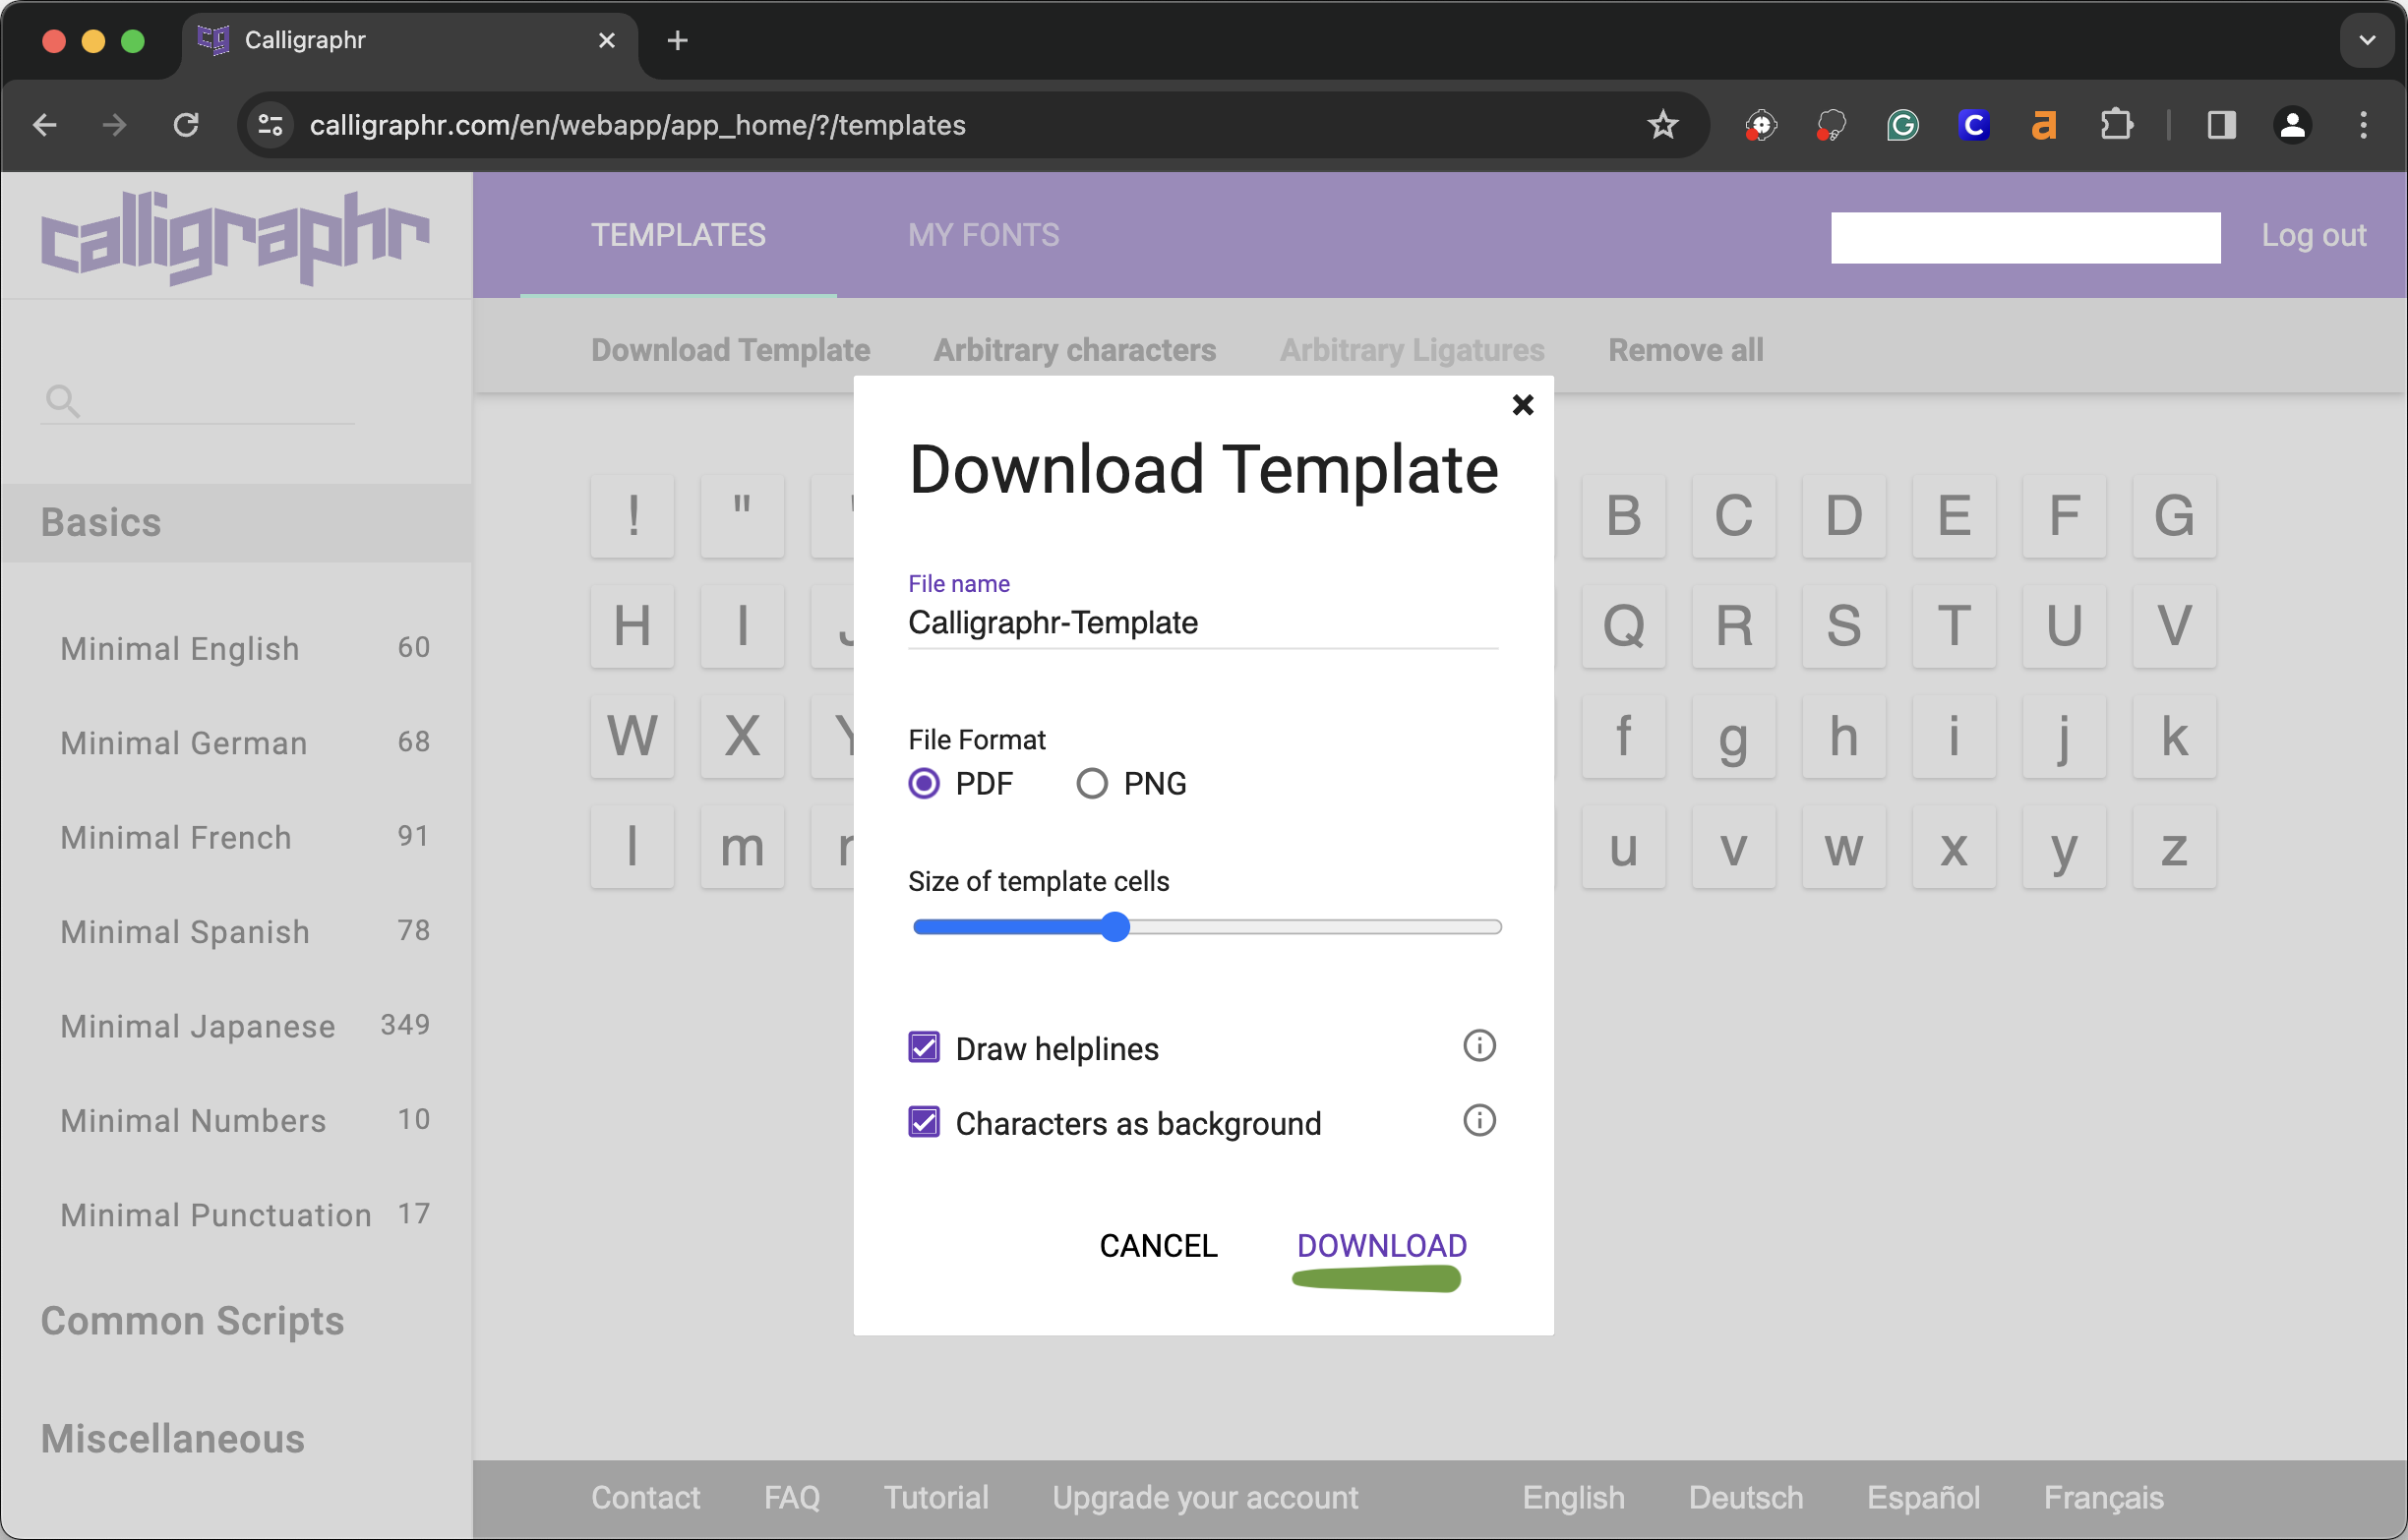
page on calligraphr to download a template. You can choose the filename, whether it is downloaded as a pdf or png image, size of the cells for letters, draw helplines, and to set the charater as the cell background.
In the pop-up you can select options, "draw helplines" is applied automatically, and I also recommend choosing "characters as background". When you are done, select "download".
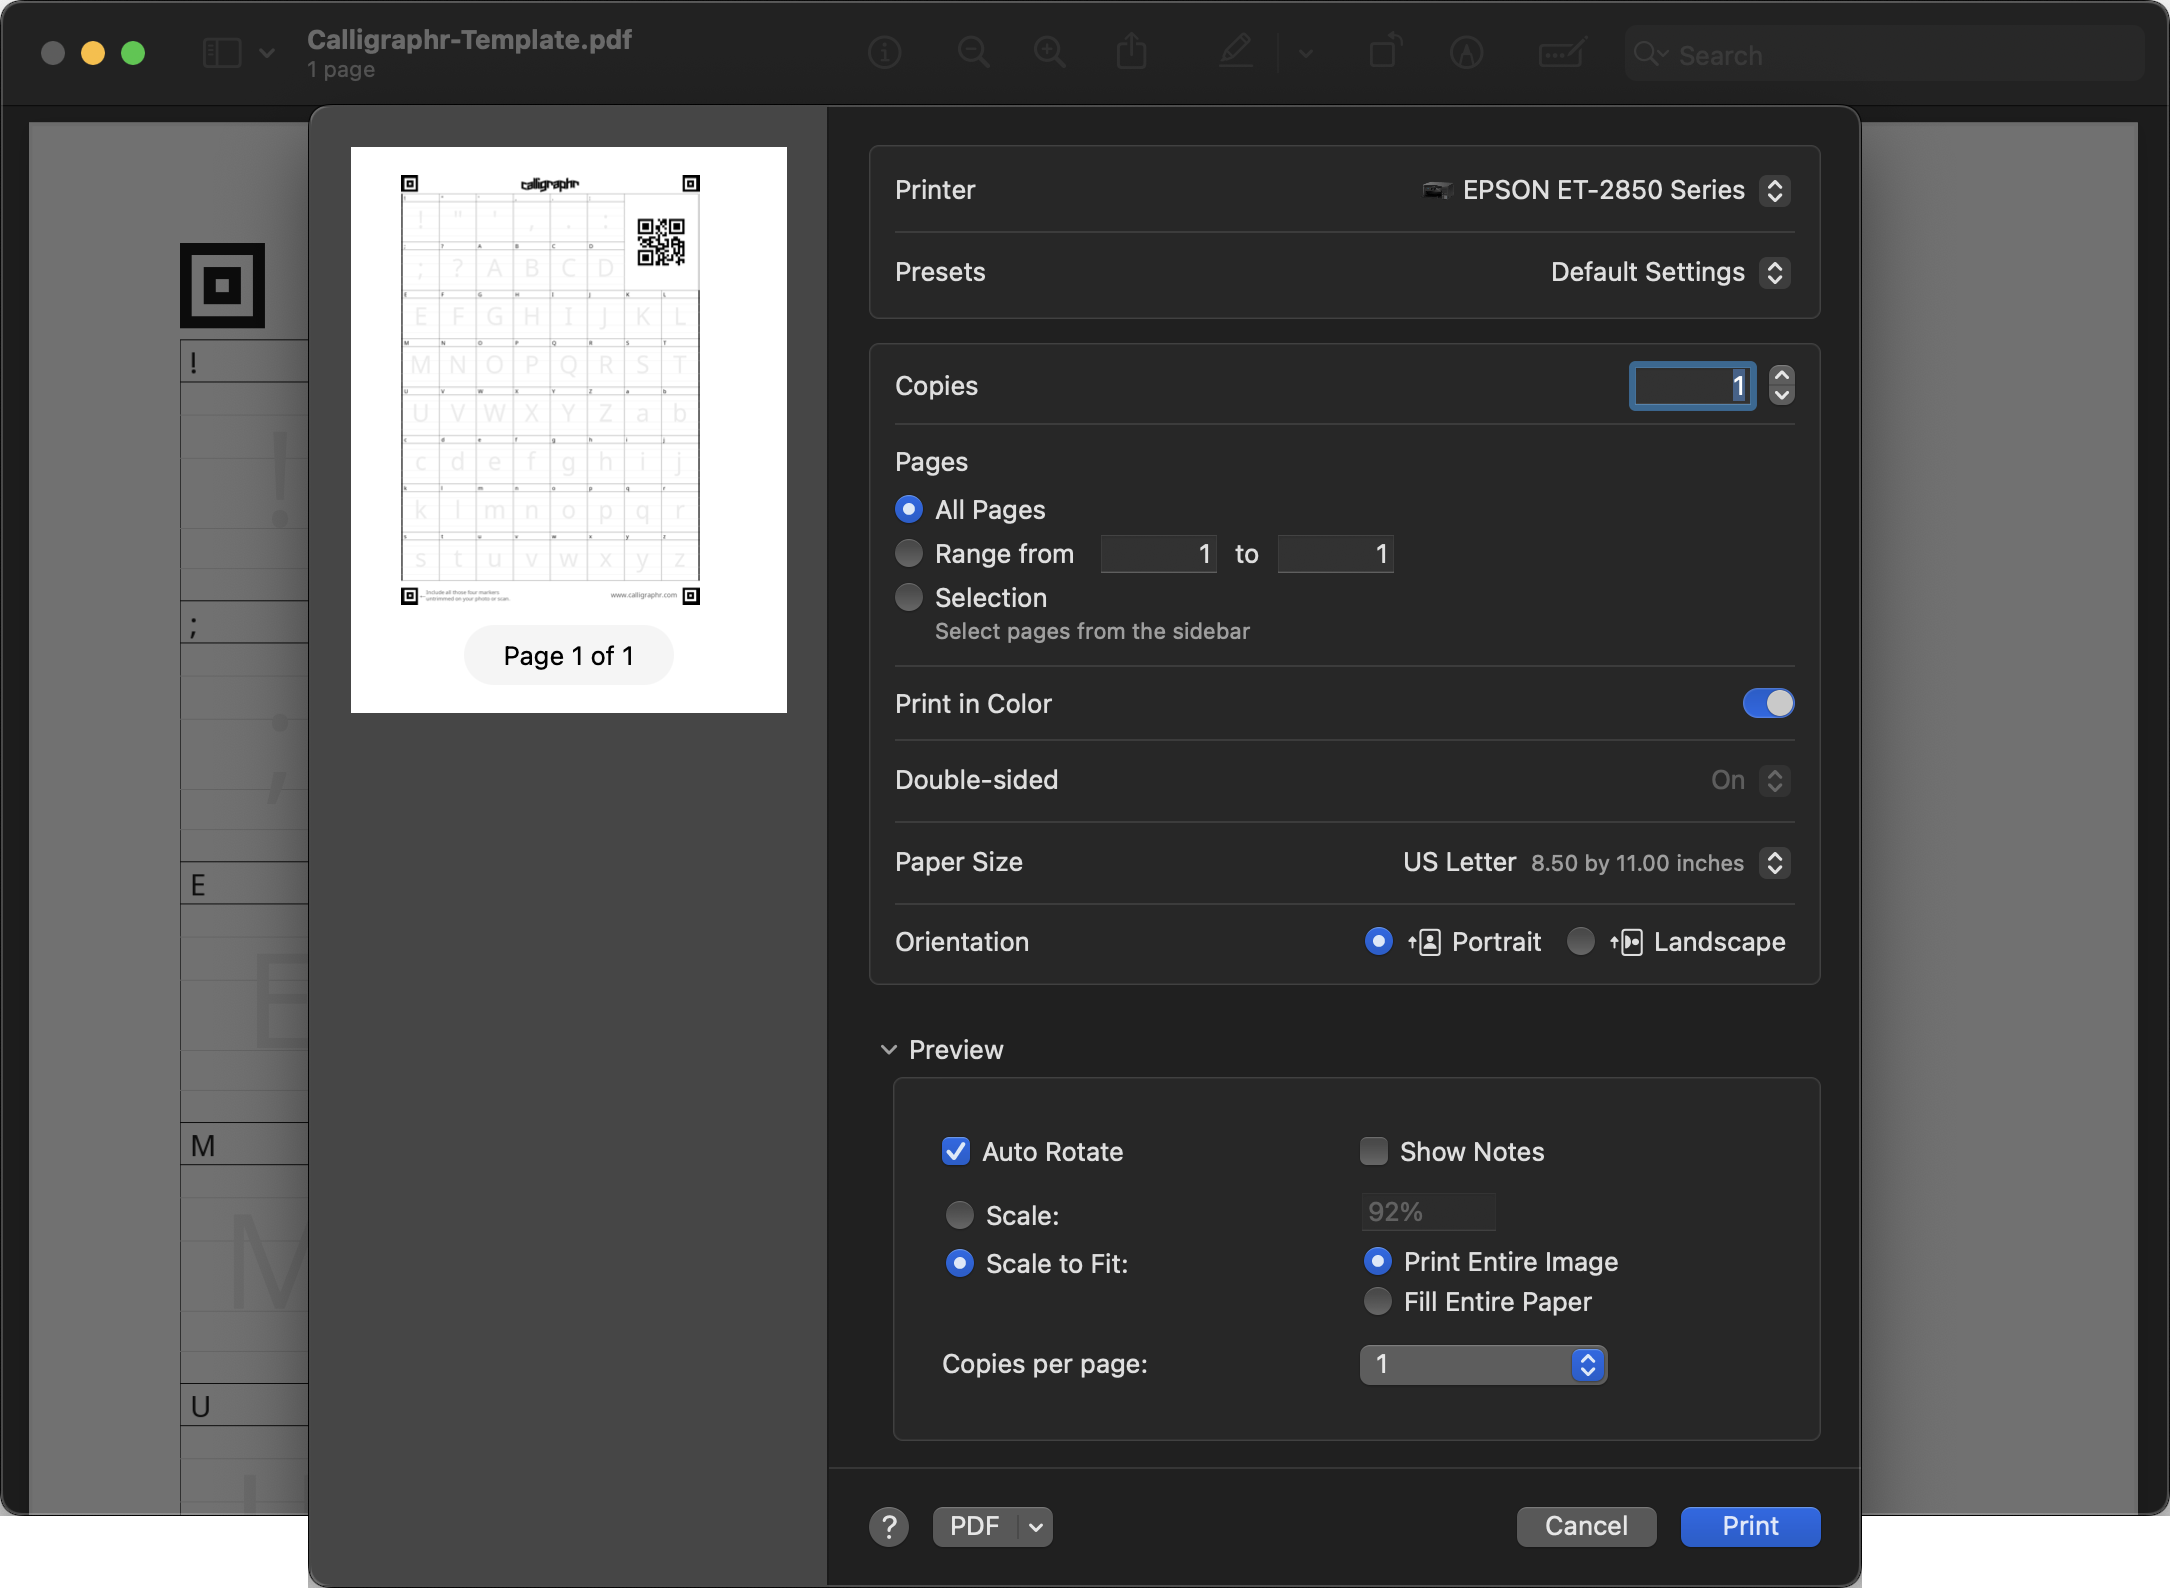
this is a screenshot of the print page on macOS.
Once you have downloaded the PDF file, print the file from your computer.

Step 4: Fill Out Each Individiual Character

draw in each character in the character cell. This is an image of me writing in a z in the z cell
On your printed template, you will need to fill out each individual character in the character's box.

Step 5: Take A Picture Of The Completed Template

When you are done writing each character, scan or take picture of the completed template. It is important that you have all four squares on the template visible in the image.

this is my scanned template that I scanned using my printer

Step 6: Upload Your Template

After you have an image of your template, go back to Calligraphr, choose "my fonts" in the navigation bar, then select "upload template". In the box that appears, select "choose file" and upload the images of your template. When you have all of your images readt, select "upload teplate".

the pop up box to upload your template image. The choose file button allows you to upload your template images, and the upload template button find the characters in your template image and will create your font.

Step 7: Choose Characters To Use

Calligraphr will automatically detect characters from the template, you can delete a character if you do not wish to use it. When you are ready click "add characters to your font".

Once you hit the upload template button, Calligraphr will automatically detect the characters in your image. It will then preview the characters it detected. In this pop-up box you are able to delete a character it detected.

Step 8: Customize Font

Once the font is ready, you can customize it to look better when viewed.


Step 9: Download Your Font

When you are ready to download your font, select "build font" at the top, name it, click "build", and you can download it as either a TTF (TrueType Font) or OTF (OpenType Font) file.

The file should automatically download. From here on, you can use the font for whatever you wish to use it for.

This is an example of how my font turned out. It did not turn out to good because I compressed my template image before uploading it, hence reducing the clarity of the characters.

Use Font On Website

If you are looking to use your custom font on a website, I found this very helpful tutorial from W3 Schools.
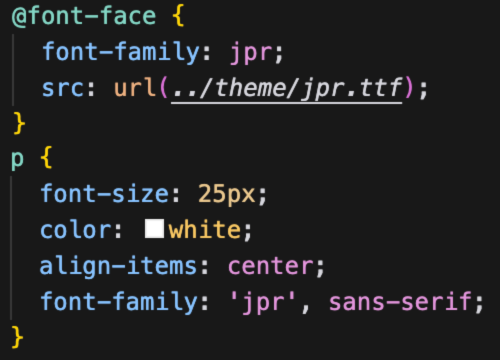
this is an example of my CSS code implementing a custom font into a website

In conclusion, turning your handwriting into a digital font is a creative and fun process that can personalize your projects. By following the steps outlined in this tutorial using Calligraphr, you can easily create your own custom font and use it for various purposes. Embrace your creativity and enjoy the unique touch your custom font can bring to your designs!


back to the top of the page button